
Book single session $49.00 usually $75
all materials included
BOOK NOW LIMITED SEATS
In this workshop, you’ll learn how to bring a whimsical character like this bumblebee lady to life using loose, expressive watercolour techniques.
We’ll start with a light pencil sketch, learning how to gently map out proportions and composition without overworking the page. You’ll see how simple shapes can build personality right from the beginning.
From there, you’ll explore how to mix watercolours with enough water to let them flow freely across the paper. I’ll show you how to create those soft, dreamy puddles of colour and how to let the paint move naturally rather than trying to control every brushstroke.
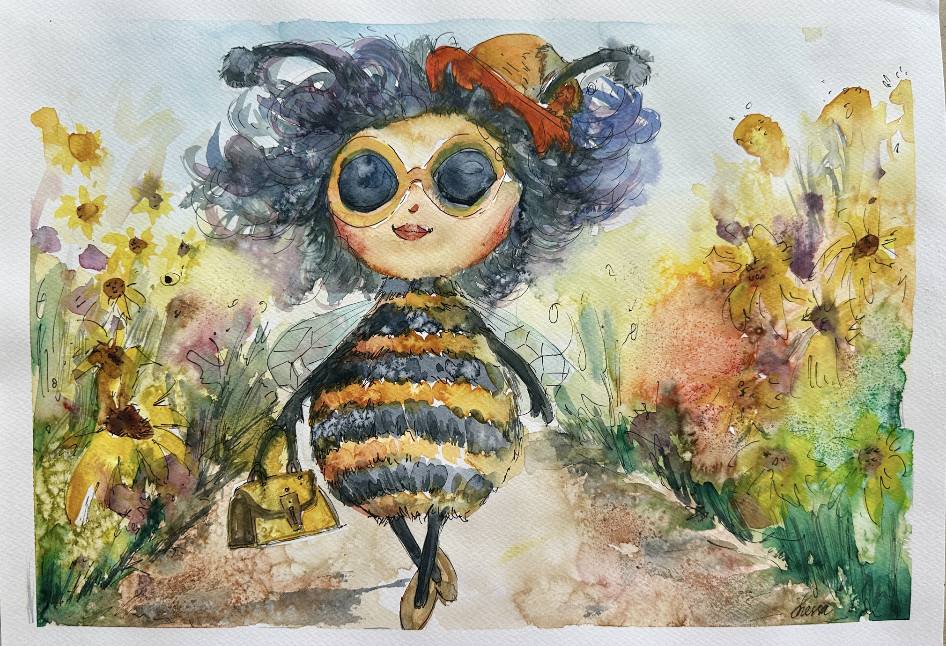
You’ll also learn how to:
• Sprinkle salt onto wet paint to create beautiful grainy textures
• Plan your composition, deciding where florals and background elements will sit.
• Layer watercolours to build depth — especially in striped details like the
bumblebee body
for faces!)
• Lift and soften areas using clean water to create delicate highlights (perfect
• Add expressive final details with black ink or gel pen once everything is dryThis workshop is all about embracing flow, layering with confidence, and adding
those final illustrative touches that make your artwork full of charm and personality
Here you’ll learn how to create a dreamy, expressive moonlit tree scene using flowing watercolour techniques and beautiful texture effects.
We’ll begin with a light pencil sketch, gently outlining the moon and the tree trunk. I’ll show you how to create a soft circular moon — and if getting a perfect circle feels tricky, you’ll learn simple ways to lightly trace and guide your hand so it feels natural and loose rather than forced. Creating a Glowing Moon
You’ll learn how to:
• Add soft yellow and brownish tones to parts of the moon
• Leave areas white to create natural glow
• Blend everything gently using plenty of water so the surface stays soft and
luminous
The focus here is learning control through water — not overworking the paint, but letting it move freely.Mastering Wet-on-Wet Backgrounds While the paper is still very wet, you’ll:
• Build dreamy layers of blue, purple, grey and soft brown
• Let colours mix in watery puddles for that misty night-sky effect
• Drop in extra pigment to create vibrancy and movement
You’ll also learn the salt technique , sprinkling table salt onto wet paint to create those beautiful speckled textures and organic blooms. Once fully dry, we’ll gently brush or shake the salt away to reveal the magical effect underneath. Building Depth with Contrast After the background is dry, you’ll learn how to:
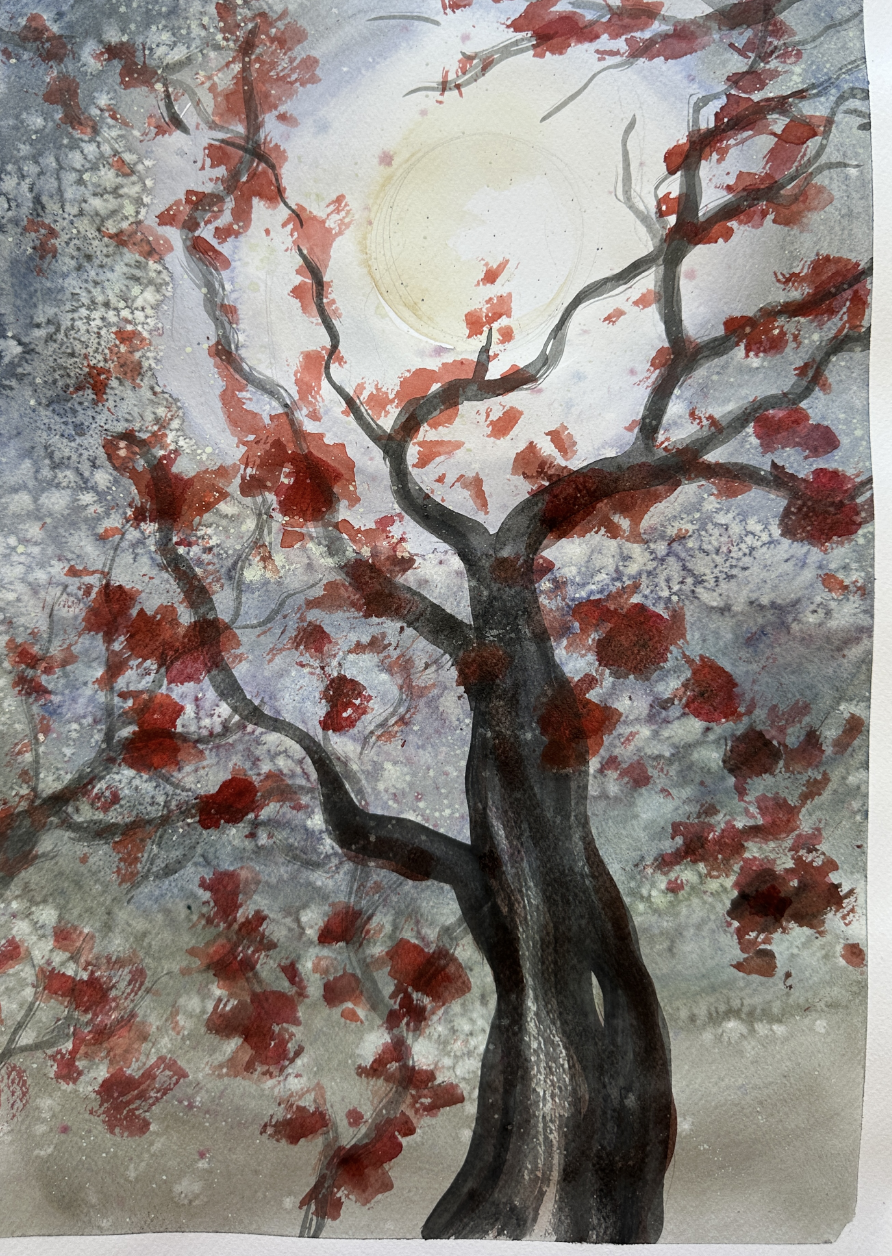
• Paint a strong, flowing black tree trunk stretching toward the moon
• Add loose expressive branches
• Soften parts of the trunk with greys and highlights so it’s not flat black
Then we’ll move into expressive foliage techniques:
• Using the side of the brush to create loose crimson-red blossoms
• Layering darker browns, reds, and purples toward the bottom for shadow
• Keeping leaves lighter around the moon to show soft reflected glow
You’ll understand how to create contrast — glowing light near the moon and deeper shadows below — so the whole painting feels dramatic and alive.This workshop is about learning how to:
Work confidently with water
Embrace wet-on-wet flow
Use texture creatively
Create light and shadow contrast
Paint in a loose, expressive style
By the end, you won’t just have a beautiful moonlit tree — you’ll understand how to control watercolour while still letting it feel free and atmospheric.